Wednesday, November 19, 2014

Pop Bottle Tree Canvas

Much like this week's first post, we're going to be making a fun, colorful, and easy canvas project with acrylic paints & just a few other items that you probably already have around your house.  We'll be using the bottom of a pop (or soda) bottle to create floral-y tree leaves with our paint.  In case you couldn't tell, I have a tree theme in my living room at home.


(Image by Etsy on their website: {https://img0.etsystatic.com/007/0/7186093/il_570xN.368858828_hbhi.jpg}.)

To Complete This Project You Will Need:

  • Any Size Canvas You Like
  • An Empty, Clean Pop Bottle
  • Mod Podge Craft Glue
  • A Sponge Paint Brush
  • Colored Pencils 
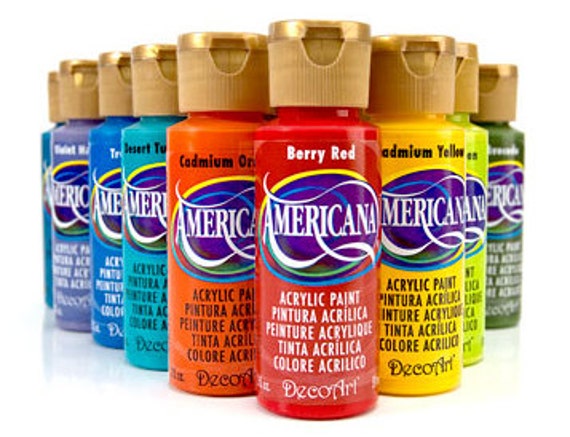
  • Assorted Acrylic Paints
  • A Paper Plate


    Canvases can cost about $3 or $4, depending on where you purchase them.  Mine is from Ollie's Bargain Outlet.


    Mod Podge comes in a variety of sizes, but for a project this size, the bottle you need is only about $4 (with the majority of the bottle left over afterwards.)  You can find this at Walmart or any craft retailer.

    Acrylic Paints can be purchased at many superstores, such as Walmart, Target, Kmart, etc. who have craft sections and at all craft retailers.  Depending on the type of paint (white kind of surface it's meant for), the brand, and size, the acrylic paints I've bought personally have run anywhere from 50¢
    to about $1.98.  The number and colors of acrylic paints you would like for your canvas is completely up to you.

    Sponge Brushes are easy to find at just about any retailer.  I purchased mine in a package of about 10 at Dollar Tree for $1.  


I first squirted some paint onto my paper plate, and then dipped the bottom of my pop bottle into it, making sure the paint covered the 4 sections and middle.


Next, I pressed the bottom of the pop bottle onto my canvas where I wanted my tree leaves to be.  I wanted to do this placement first so that I'd have a started point to combine with my drawn tree trunks.


I then continued with my base leaf color of green to more fully develop the shapes of the trees and leaves.  This project is a little more abstract and playful.  I kinda felt like it looked like a kid's finger painting, but I didn't really care.


As you can see in the above picture, after I added more "leaves" to my tree, I also made a rough sketch of my tree trunks.


Next, I colored in my tree trunks with colored pencil, to give them some depth & definition, while also letting my first layer of "leaf" paint dry.

I then chose 3 more colors of acrylic paint to add on top of the green (which I did not wait for each color to dry before applying the next.)  I wanted to show the changing of seasons through the leaves of the two trees, so I layered red, orange, blue, & white paint onto the leaves.

Once you've painted each of your leaf colors onto the canvas, it's a good idea to let the paint dry overnight.  Afterwards, you can paint on your Mod Podge craft glue with the sponge brush to give your canvas a seal, as well as a nice matte or glossy finish.

 Voila! You've Made Your Own Pop Bottle Tree Canvas!
Thank You & Enjoy!

Eggshell Paint Splatter Canvas

This week we're back with some fun canvas projects.  Today's will be making our own paint splatter canvas using old eggshells. This project is fun, colorful, creative, and very inexpensive.

 (Image by Graphic Leftovers Design Blog on their website: {http://graphicleftovers.com/blog/vector-rainbow-paint-splatter/}.)


Items You'll Need for this Project:
  • At Least 6 or More Emptied and Rinsed Eggshells
  • Any Size Canvas You Like
  • Mod Podge Craft Glue
  • A Variety of Acrylic Paint
  • A Sponge Craft Brush

 Canvases can cost about $3 or $4, depending on where you purchase them.  Mine is from Ollie's Bargain Outlet.


Mod Podge comes in a variety of sizes, but for a project this size, the bottle you need is only about $4 (with the majority of the bottle left over afterwards.)  You can find this at Walmart or any craft retailer.

Acrylic Paints can be purchased at many superstores, such as Walmart, Target, Kmart, etc. who have craft sections and at all craft retailers.  Depending on the type of paint (white kind of surface it's meant for), the brand, and size, the acrylic paints I've bought personally have run anywhere from 50
¢ to about $1.98.  The number and colors of acrylic paints you would like for your canvas is completely up to you.

Sponge Brushes are easy to find at just about any retailer.  I purchased mine in a package of about 10 at Dollar Tree for $1. 


In order to keep the eggs in good enough shape to use for this project, I cracked them as delicately as I could, while trying to keep the shells as intact as possible.

 Once you've rinsed your eggshells, fill them about ½ to ¾ of the way full with your desired acrylic paint colors. Until you're ready to actually use the paint-filled eggshells on your canvas, it's probably a good idea to carefully place them back into their carton.

After you've filled your eggshells, set your canvas up somewhere clean and protected, as to not get paint all over your floor or house.  I completed this project before it was cold outside, so I just leaned my canvas against a tree trunk. 

 (Image by Raspberry Rain on their website: {http://raspberryrain.co.uk/2014/06/24/fun-things-to-do-paint-filled-eggs/}.)


Now comes the fun part!  Take your paint-filled eggshells, one or two at a time, and fire them at your canvas.  Some eggshells will stick with the paint of your canvas, giving it a cool "mixed medium" effect, while others will fall off, just leaving their paint behind. 


Once you've splattered your eggshells onto the canvas, it's a good idea to let the paint dry overnight.  Afterwards, you can paint on your Mod Podge craft glue with the sponge brush to give your canvas a seal, as well as a nice matte or glossy finish.


Voila! You've Made Your Own Eggshell Paint Splatter Canvas!
Thank You & Enjoy!

Wednesday, November 12, 2014

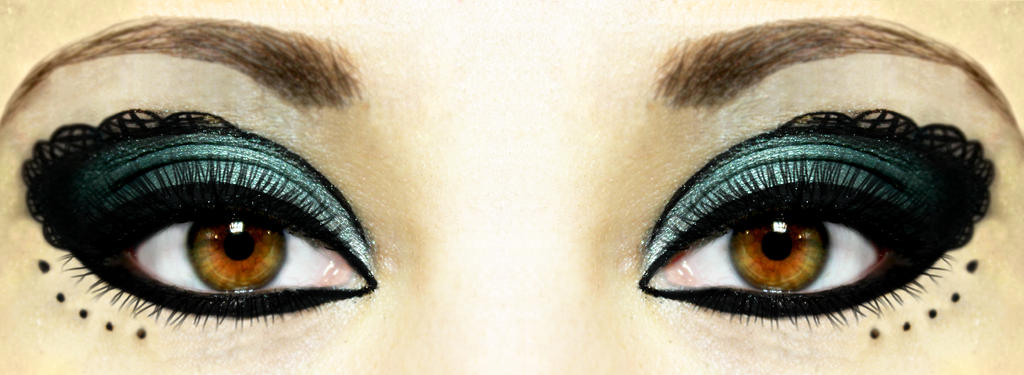
DIY Extra-Easy Eyeliner

Much like our homemade Super-Simple Lip Gloss, today's Extra-Easy Eyeliner is a quick, fun project with just a couple ingredients.


(Image by Deviant Art on their website: {http://fc05.deviantart.net/fs71/i/2013/060/5/2/lace_eyeliner_by_salemroseartistry-d5wnqe0.jpg}.)


To complete this project you will need:

  • Small, Round Makeup Pots or Craft Bead Containers
  • Coconut Oil
  • Activated Charcoal Capsules
  • A Small Bowl & Spoon
  • A Fine-Tipped Paint Brush or Cosmetic Brush

Makeup Pots may be a little challenging to find in local stores sold as, "makeup pots."  Luckily, I found mine at Pat Catan's craft store in a package of 12 for about $3.50 in the jewelry storage section.  You may be able to find similar bead containers at stores like Walmart with craft sections.  Additionally, stores with Travel/Trial item sections carry small, round containers with twist off lids, perfect for this project, for just $1 for 2. 


 I was a little wary of purchasing Coconut Oil, because I knew it had a history of being expensive, so I was relieved when I found a 14 oz. jar of LouAna brand at Walmart for $3.78.  Nowadays with people more health-conscious and organic-food inclined, coconut oil is pretty easy to find at most grocery stores.


 I've heard about more and more uses with Activated Charcoal lately, so I wasn't completely surprised when I saw that the recipe for this eyeliner called for it.  It has a lot of household uses, medicinal properties, and can obviously be used for DIY beauty products!  I tried to find a bottle of charcoal capsules at Walmart, since I'd seen them on their website, but to no avail.  I wound up purchasing them from the health store, GNC.  They were a little bit pricey, so if you're trying to watch your pennies and don't mind waiting a few days to receive them, I would recommend purchasing them from a less-expensive online retailer, such as Amazon.


If you have an old eyeliner brush you're interested in re-using with our homemade eyeliner, more power to you.  I opted for some new fine-tipped brushes and was pleasantly surprised to find a 10-pack of fine-tipped assorted art brushes at Walmart for $3.97.


First, spoon about 1/2 teaspoon of coconut oil into your mixing bowl.


Next, twist apart 2 or 3 of your Activated Charcoal Capsules and pour their contents into your mixing bowl until the mixture has a smooth, even consistency.


Lastly, just spoon your mixture into your makeup pot or bead container & use your art or cosmetic brush for application.


Voila!  You've Made Your Own Extra-Easy Eyeliner!
Thank You & Enjoy!

DIY Super-Simple Lip Gloss

This week we're going to be taking a different route, and will be focusing on making a couple cheap, easy, DIY makeup items:  lip gloss & eyeliner.
(Image by Resellers-Heaven on their website: {http://minisite.resellers-heaven.com/Lips/images/lipgloss.jpg}.)


To complete this project you will need:

  • Small, Round Lip Gloss Pots or Bead Containers
  • Petroleum Jelly (Vaseline) or Un-Petroleum Jelly
  • Wilton's Pearl Dust in Your Choice of Color
  • A Small Bowl & Spoon
  • A Fine-Tipped Paint Brush or Cosmetic Brush (Optional)

    Lip Gloss Containers may be a little challenging to find in local stores sold as, "lip gloss containers."  Luckily, I found mine at Pat Catan's craft store in a package of 12 for about $3.50 in the jewelry storage section.  Some superstores with craft or bead sections may carry these containers, but you shouldn't have any problem at all finding them in a craft store.

    Petroleum Jelly is a universally found and inexpensive item.  It can be found at any superstore, dollar store, or grocery store in the health and beauty section from $1-$4.50+ depending on the brand, variety, and size jar you buy.  Un-Petroleum Jelly is a little fancier, due to its being made with plant oils and beeswax, and runs about $7 a tube.  If the more natural choice is your style, you can find it online at retailers such as Amazon.

    Pearl Dust, made by cake decorating brand Wilton, is actually edible, decorative, colored dust used on fondant and gum paste when making cakes or other treats.  It can be found in cake decorating stores or craft stores in their baking aisle.  The pearl dust comes in a variety of colors, such as red, pink, green, gold, silver, and bronze, and can be shimmery or matte.  I purchased mine from the baking aisle of Pat Catan's for about $4.


    First, spoon about a tablespoon of your petroleum jelly into your bowl.


    Next, sprinkle some of your pearl dust over the petroleum jelly & mix until you  have the desired color.


    Lastly, just spoon your mixture into your lip gloss pot or bead container.
     Voila! You've Made Your Own Super-Simple Lip Gloss!
    Thank You & Enjoy!

Sunday, November 2, 2014

Decorative Glass Prism Candle

Today's project is going to be making our own Decorative Glass Prism Candles.  These candle jars are very easy to make, very elegant, and give the room a warm, cozy feel, as we immerse ourselves in the fall and winter months.

(Image by Ali Express on their website {http://www.aliexpress.com/price/decorative-glass-cylinders_price.html}.)

 To complete this project you will need:

  • A Mason Jar or Clean/Empty Candle Jar
  • Glass Aquarium Stones or Decorative Pieces
  • E6000 Craft Super Glue
  • Paintbrushes
  • A Tea Light, Votive Candle, or a Battery-Powered LED Light


    Mason Jars, or similarly shaped and sized glass jars, can be found at a variety of retailers such as craft stores, dollar stores and superstores.  These typically only run a couple of dollars.

    Glass Aquarium Stones can be purchased
    at a variety of retailers such as, craft stores, pet stores, Walmart, etc.  Bags are usually about $2-$3 apiece.

    E6000 Craft glue can be found at any craft store or superstore.  Unfortunately it usually runs anywhere from $3 or $4 up to about $7 or $8 depending upon where you're buying it, the size, and the specific variety.  Luckily, however, while perusing the aisles of Dollar General, I found a tube in their tool and auto aisle for only $2.50.

    As with most of the supplies, paintbrushes can be found at virtually any superstore, craft store, or dollar store.  I bought mine in a package of about 10 from Dollar General for $1-$2.

    Similarly tea lights, votives, and battery-powered LED lights can be found at any of our usual variety of stores.  I enjoy buying tea lights from Dollar General, because they have delicious holiday scents in boxes of 8 for only $1 (I love the Iced Gingerbread.)

    Also, I bought a package of 2 battery-powered LED lights at Dollar Tree for just $1.
Much like my other projects, this one is relatively easy and inexpensive, yet yields store quality results.


First, after ensuring that your glass jar is clean and dry, you can open your glue and squeeze a small amount onto some newspaper, a paper plate, or some kind of working surface.  Then, you'll dip our paintbrush into the glue, and beginning near the top of the jar, paint the glue onto a small section of the glass.

Next, you can begin adhering your glass stones or decorations to the jar.  It's a good idea to already have a design or pattern in mind before you start gluing, to ensure that the glue is at its stickiest when you're placing the stones.


You will continue this process until your jar is covered with the decorative stones.  It's a good idea to let the stones set for a couple hours before trying out your candle or LED light.  Once your stones are dried to the jar, you're all set!  Drop in your candle or turn your LED light on & enjoy!


Voila!  You've Now Made a Decorative Glass Prism Candle!
Thank You & Enjoy!

Confessions of an Amateur Extreme Couponer


We've probably all seen TLC's show, "Extreme Couponing," where serious savers plan out their sales and shopping strategies for the week, spend 40+ hours that week researching & clipping coupons, ultimately spending hours in the grocery store to usually save 90+% on their bill...that's me, but on a seriously saner level.

 (Image by Coupon Website Reviews on their website {http://couponwebsitereviews.com/extreme-couponing-101-review.html}.)

My interest in coupons & couponing started a few years ago when I started living on my own.  Part of it was because I worked part time & was back in school part time, so I was trying to save money, but I was also excited by the idea of getting good products for really great deals.  

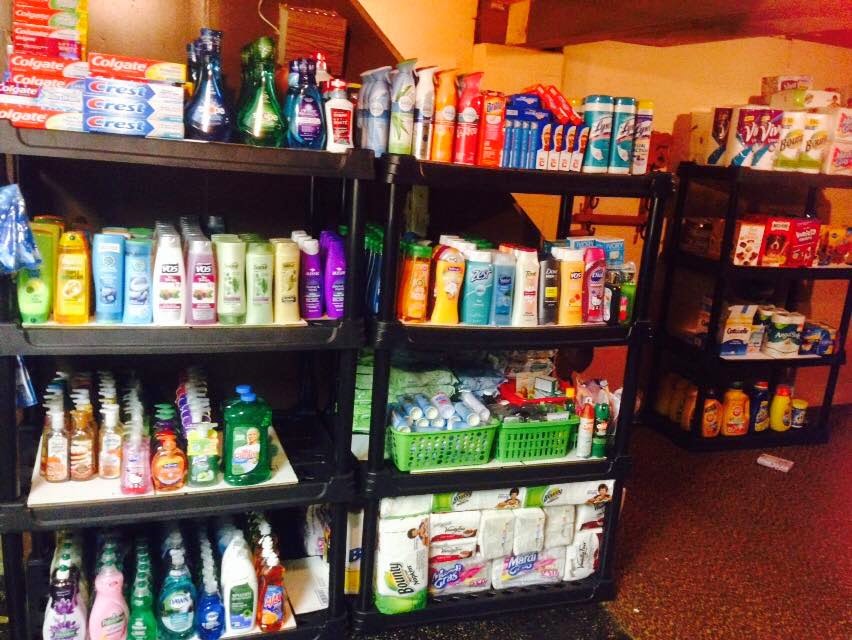
It started out as just getting some good deals on personal care items, like deodorant, shampoo/conditioner, body wash, & toothpaste that I was able to store on a shelf in my bathroom closet.

Shortly thereafter, the scope of my coupon-purchased items broadened to include dish soap, Bath & Body Works hand soaps, Lysol antibacterial wipes, paper towels, kleenex, etc.


Over the years I've used various methods of collecting my coupons.  In most areas, SmartSource & Red Plum coupon inserts come in the mail with local store sales ads every Tuesday.  These inserts include coupons for a wide variety of edible & inedible grocery items.  As the hyperlinks show, both of these insert companies have their own websites where you are able to print coupons from home.  Two of my favorite online printable coupon websites are Coupons.com & Coupon Suzy.
 
(Image by Coupons.com from their website {www.coupons.com}.)

 
(Image by Coupon Suzy from their website {www.couponsuzy.com}.)

A lot of serious couponers match up multiple stores' weekly sales ads with the coupons that are currently in circulation, using their research findings and coupons at a variety of different stores.  I really don't have the time or interest in couponing all over town.  The majority of my coupon purchases happen  at Giant Eagle, because I have one close to my house & also  because they double the value of manufacturers' coupons up to $1. 
 (First Stockpile Shelf...approximately a year ago)

The method to my madness is basically just cutting out coupons in the weekly inserts and printing online coupons.  If I know a particular item or items are going to be going on sale and I have coupons for those items, I will try my best to schedule a couponing trip during that time to maximize my savings.  Additionally, if the store is out of a particular item that is on sale that week that I have coupons for, I will get a rain check from my store's customer service desk.  This allows me to buy that item at a later date when it's back in stock at that previous sale price.

 
(Second Stockpile Shelf, June 2014)

In addition to the adrenaline rush and enjoyment I get from turning a $223 grocery bill into an $88 one, I'm also very happy to help others in need with items from my stockpile.  Lots of organizations in your city or town accept donations of food & non-food items alike.  I enjoy donating items to and through my church, in addition to the local women's shelter and rescue mission. 

(Third Stockpile Shelf, June 2014)

So, if you're like me and love a good deal, love not having to run to the store when you're out of something, & are on a budget, couponing might be a good idea for you!


(Current Stockpile Shelves, October 2014)

Clip a couple this week & see how it goes! 
Thank You & Enjoy!


Thursday, October 30, 2014

Milk Jug Jack O' Lanterns

'Tis the season for spooky & fun!  This week's post is going to demonstrate how to make faux jack o' lanterns from recycled gallon milk jugs.
(Image by Historic Hudson Valley from their website {http://www.hudsonvalley.org/sites/default/files/imagecache/Slideshow/blaze_slide5.jpg}.)


In order to complete this project you'll need:
  • Several Empty/Clean Gallon Milk Jugs
  • A Permanent Marker
  • Glow Sticks


Permanent Markers can be found virtually anywhere & everywhere for only $1 or less.  Mine came in a 2-pack from Dollar General for $1.

Glow Sticks can be found just about anywhere as well.  Most general retail stores such as Walmart, Kmart, Target, etc. sell them year-round in their party section.  Other retailers such as grocery stores, like Giant Eagle, sell them this time of year in their season aisles for just $1-$2 per package.  I purchased a tube of 20 variously colored glow sticks from Dollar Tree for only $1.

Using your permanent marker, draw jack o'lantern faces onto your milk jugs.


Next, fill up your milk jug about 1/2 of the way with water.  Then, crack a couple of glow sticks & drop them into the water.  The added water helps to reflect the light & glow from the glowsticks to illuminate the jug.


Voila! You've Made Milk Jug Jack O' Lanterns!
Thank You & Enjoy!