Friday, December 12, 2014

Funfetti Sprinkle Candle

   This week's posts are my last official posts of my school assignment.  However, due to the warm responses of my readers, I will definitely be keeping up with this blog.  Perhaps it won't be twice a week, as assigned, but rest assured, when I complete a DIY or craft project, I'll be sharing it with everyone.

Today's project will be making our own Funfetti Sprinkle Candle.  Just about everyone loves either the taste, look, or smell of sprinkles and other assorted confections, so why not spice up an old candle/mason jar with some sprinkles and yummy aromas for an all-new item?!  As usual, we'll only be using a handful of items which will be relatively inexpensive, and some of which you may already have at home.


To Complete This Project You Will Need:

  • 2 Pint (16 0z.) Mason Jars or Recycled & Cleaned Candle Jars
  • Candle Wicks
  • Water
  • Corn Syrup
  • A Small Paint Brush
  • Rainbow Sprinkles
  • Wax Flakes or Wax from Old Candles
  • Scented Wax Blocks or Scented Candle Oils 
  • Hot Glue Gun (optional) or Scotch Tape
  • Funnel or Spouted Measuring Cup (optional)

If you don't have any old candles sitting around at home and need to purchase mason jars you shouldn't have too much of a problem.  They are usually available at craft stores & superstores, especially in the fall around canning time, for just a few dollars apiece.  I lucked out and my local grocery store had their fall floral items discounted, which included these brightly colored jars, for just $1 each!

Candle Wicks aren't really an everyday item that you see or buy, so chances are you'll have to purchase them at a craft store.  All craft retailers such as, Michael's, JoAnn's, Pat Catan's, & Hobby Lobby should carry a multitude of wicks.  They usually run about $2-$3 a package (usually about 6), dependent upon the length of the wicks and how many are included.  I purchased my wicks in a package of 6 from a local, non-chain craft store for $2.59.

Corn Syrup can be easily found at any grocery or superstore in their baking aisle in a 16 oz. bottle for under $3.  As luck would have it, I accidentally found myself a bottle of corn syrup at my favorite store, Dollar Tree, for just $1 for a 12 oz. bottle.

Instead of spending the $8-$12 that craft stores charge for wax flakes or blocks of wax to melt down for candle-making, I decided to recycle some old candles I already had, as well as adding in a couple new wax melts & small, dollar store candles.
Scented Wax Blocks can be purchased at most craft stores for $3 or less.  I found mine at my local, non-chain craft store for $2.99 for 6 blocks.  Since this was my first candle-making venture, I wasn't sure how I would like the scented wax blocks vs. scented candle oil, so I decided to buy both.  Scented oils can be found at most craft retailers for $3 or less as well.


Firstly, we'll be coating the inside of our mason jar with corn syrup.  You can either squirt it directly in your jar and then turn & swirl it around to coat the inside, or use your paintbrush to ensure that the inside is well-coated.


Place your candle wick at the bottom-center of your jar.  Some folks who've made this craft in the past have found it easiest to hot glue the metal disk of the wick to the bottom of the jar to ensure that it stays in place. I just used some scotch tape around the disc of the wick & taped it to the bottom of the jar.

 Next, shake in some sprinkles!  With one hand over the top of your jar, use your other hand to shake the jar, causing the sprinkles to stick to the corn syrup surfaces.  You can press any fallen sprinkles back into the sides of the jar.


Once you're satisfied with the covering of sprinkles on the inside of your jar, it's time to melt the wax for your candle.  If you already own a double boiler you're one step ahead of the game.  I do not, so I improvised with my own makeshift one.  Simply fill a medium-sized sauce pan about 1/4 to 1/2 full with water over low to medium heat.  Then place a larger sauce pan on top of the medium one, and place your old candle wax inside.  Within a few minutes you should start to notice your wax melting into a nice, smooth liquid.  Once your wax has melted you can drop in some of your liquid scented oil or your scented wax blocks.


As soon as your wax has reached a melted, even consistency and your scent has been added, it's time to pour our candle!
You can choose to use a funnel or spouted measuring cup for a neater pour, or just pour your melted wax straight from the sauce pot into the jar.


Once your wax is poured into your jar, all that's left to do is for the wax to set and harden.  The easiest way to ensure that this happens as quickly & hassle-free as possible is to stick your jar in the freezer for a couple hours.  Afterwards, you are ready to light & enjoy your delicious new candle!


Voila! You've Made Your Own Funfetti Sprinkle Candle!
Thank You & Enjoy!

Sunday, November 30, 2014

Sugar Skull Sharpie Alcohol Canvas

 It's back to canvases we go, this week, for a couple of abstract, unique pieces.  Today we're going to make our own watercolor canvas painting using Sharpie markers & rubbing alcohol.  Watercolors give pieces an airy, whimsical, daydream-y feeling that I'm hoping to replicate by the end of this project.


(Image by Urban Road on their website: {http://www.urbanroad.com.au/shop/2013-spring/nebula/}.)

Items You Will Need for This Project:
  • Any Size Canvas You Like
  • A Pencil
  • Sharpie (or Similar Permanent Marker)
  • Rubbing Alcohol
  • A Small Spray Bottle
Canvases can be found at some discount stores and superstores, as well as all major craft retailers such as JoAnn's, Michael's, Pat Catan's, Hobby Lobby, etc.  They can range in price depending upon the size, brand, and color.  I bought mine at Ollie's Bargain Outlet for about $3.

All of our other necessary items are pretty easily found just about anywhere for just $1.  I already had Sharpies and pencils at home, so I just purchased my rubbing alcohol & spray bottle at Dollar Tree for just $1 each.


I first made a rough sketch in pencil of what I wanted my image to be.  I chose a sugar skull (because I've always thought that they're fun, bright, & have a nice cultural aspect to them), but you can choose to sketch whatever the heck you like.


After my sketch was completed, I went over top of all my pencil lines with a black, ultra-fine Sharpie to give it a nice outline.


Next, I used my sharpies to color in my sketch.


Once my sketch was colored in, I sprayed the entire colored area with my rubbing alcohol spray bottle.


Once the colors started to run, I picked up my canvas and tilted it in different directions to spread out the running colors.


After I was satisfied with the watercolor effect, I just left my canvas to dry for about an hour or so until it was ready to hang.


Voila! You've Made Your Own Sharpie Watercolor Canvas!
Thank You & Enjoy!

Melted Crayon Splatter Canvas

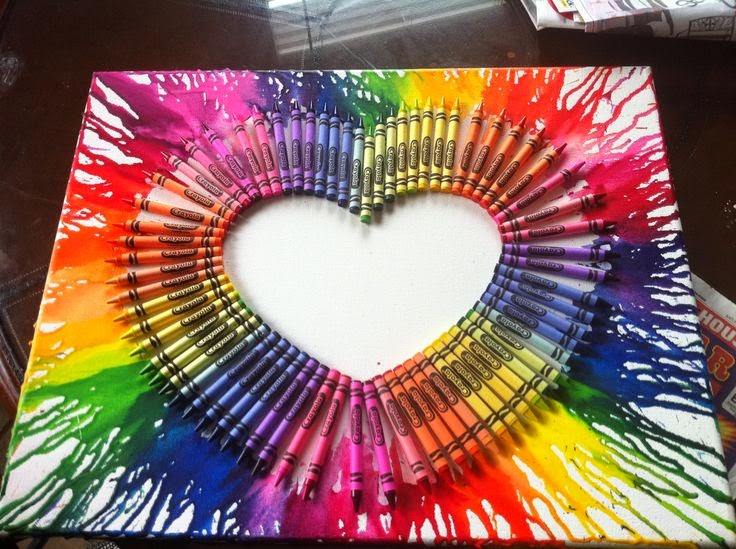
Similar to this week's first post, today we're going to be sketching an image on canvas, but combining it with melted crayon splatter to create a more edgy, abstract piece.


{Image by  Zujava on their website: (http://www.zujava.com/melting-crayon-art).}

To Complete This Project You Will Need:
  • Any Size Canvas You Like
  • A Pencil
  • A Variety of Crayons
  • A Hair Dryer

Canvases can be found at some discount stores and superstores, as well as all major craft retailers such as JoAnn's, Michael's, Pat Catan's, Hobby Lobby, etc.  They can range in price depending upon the size, brand, and color.  I bought mine at Ollie's Bargain Outlet for about $3.
 
Unlike the photo above, in which the artist taped down a variety of crayons and then blow dried them, I held my crayons one at a time above my canvas and melted them with the dryer.  I love the effect this created, because instead of just drops of wax, the airflow from the dryer caused the wax to hit the canvas while it was in motion, giving it a nice paint splatter appearance.


I first chose a crayon and peeled about half the paper off of it from the top, allowing more of the wax to be exposed for melting.

I then held my crayon over the canvas with one hand, while using the blow dryer in the other.  It took maybe a minute to heat the crayon up enough for it to start melting onto the canvas.


I continued this method of melting until I had all of the wax drops & splatter I needed.  I believe I used about 10 colors of crayons.


 Next, I wanted to draw an image to incorporate with the crayon splatter.  I chose to do another sugar skull for this week.  I first sketched it in pencil on the canvas.


 I then outlined my sketch with an ultra-fine, black Sharpie marker to give it an outline and strong definition.


I then decided to color in my sketch with crayons.  I could have used another form of color, such as Sharpies, but since the crayon splatter is so bright and vibrant, I wanted to downplay the coloring of the sketch a little, so that the two elements of the piece could play off each other.


 Once your sketch is colored, your canvas is just about wrapped up!
I was going for a pretty/morbid vibe with this piece that I think I achieved pretty well.  The crayon splatter can be seen as a bright idea, a daydream, or perhaps some brain or skull fragments.  The viewer always has the opportunity to decide what artwork is to them personally:  subjective.


 Voila! You've Made Your Own Melted Crayon Splatter Canvas!
Thank You & Enjoy!

Sunday, November 23, 2014

DIY Eye Makeup Primer

Sorry, guys, this is another week that these posts most likely won't interest you...unless you enjoy wearing eyeliner, mascara, and eyeshadow.  Most ladies have experienced, at one time or another, that infuriating moment when you realize that some, or all, of your eye makeup has worn off, leaving only remnants of it on the crease of your eyelid.  Eye Makeup Primer has been the God-send to solve this problem, but it's usually somewhere in the ballpark of $8 and up...and up...and up.  Today we're going to make a homemade, inexpensive, two-ingredient recipe for our own primer that'll cost you 90+% less than the major makeup brands, as well as rival their results.


To Complete This Project You Will Need:

  • Body Butter or any Thicker Lotion (Scented or Non-Scented depends upon you & your skin sensitivities.)
  •  Liquid Foundation Makeup
  • Lip Gloss Pots or Craft Bead Containers
Body Butter is essentially just a thicker lotion, usually "whipped" with a very creamy consistency.  It can be found at many drug store retailers and superstores, and even more specialty stores like Victoria's Secret & Sephora.  Depending on how fancy you want to get and the brand you're interested in, prices can vary from around $3-$5, all the way up to ~$20.  I bought mine on clearance from Kmart for just under $3.   

Liquid Foundation can also be found almost anywhere, from dollar stores, to drugstore retailers, to any superstore.  If you're trying to make this product for as cheap as possible, I'd definitely recommend a foundation from somewhere like Dollar Tree, Dollar General, etc. where you'll only have to pay $1.  If you already have a regular foundation brand that you normally use for your face, by all means, use that for our project as well.  I'm not a huge wearer of liquid foundation, but I always enjoy Cover Girl products (especially since P&G always puts out Cover Girl coupons!)  This tube was about $5 after coupon.

Lip Gloss Pots may be a little challenging to find in local stores sold as, "lip gloss pots."  Luckily, I found mine at Pat Catan's craft store in a package of 12 for about $3.50 in the jewelry storage section.  You may be able to find similar bead containers at stores like Walmart with craft sections.  Additionally, stores with Travel/Trial item sections carry small, round containers with twist off lids, perfect for this project, for just $1 for 2. 


First, squeeze or pour (if using a bottle) about a nickle-sized amount of the liquid foundation into the storage container. 


Next, scoop in some body butter.  I just used my finger to scoop it out and put it into my storage container.  It was probably about a tablespoon.  I was just trying for enough to fill my container most of the way.


Mix your ingredients together with a toothpick, or similarly sized item, until the primer has an even color and smooth consistency.  If you like a thicker primer, either add more foundation from the beginning, add less body butter, or once you've mixed the initial amounts together, add more foundation to achieve more thickness.


Do a quick test spot if you'd like to get an idea of how the primer might look & the results it'll give you.  In the picture below, the eyeshadow on the top was applied over top of primer that I blended into my hand.  The eyeshadow on the bottom was applied to just a clean, dry section of my hand without any primer.


Once you're happy with the color and consistency of your primer, it is ready to use!


Voila! You've Made Your Own Eye Makeup Primer!
Thank You & Enjoy!

DIY Charcoal Face Scrub/Mask

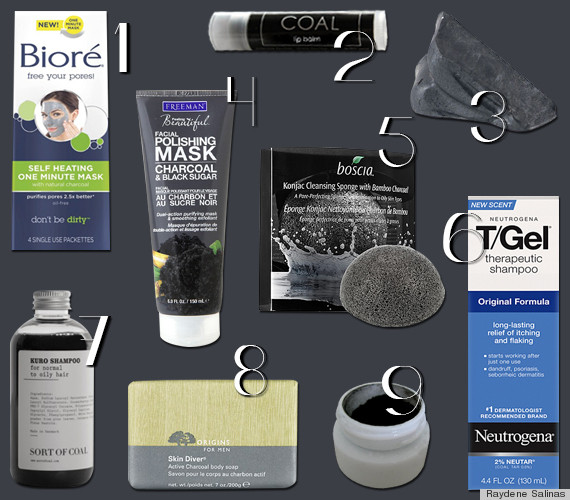
If you're like me, there's probably something about your skin you're not in love with. I've always felt like I had big pores & blackheads on my nose & cheeks, even though they're not really noticeable to anyone but me, but we all know that doesn't really matter in the land of insecurities.  Alas & henceforth, today we're going to be making a charcoal face scrub/mask with just a few ingredients.

(Image by Huffington Post on their website: {http://i.huffpost.com/gen/1643224/thumbs/o-CHARCOAL-PRODUCTS-570.jpg}.)


To Complete This Project You'll Need:
  • Activated Charcoal Capsules
  • Aloe Vera Gel
  • Honey
  • Sugar
  • Water
  • 2-4 oz Storage Container
  • Mixing Bowl/Spoon

Activated Charcoal capsules can be found at most health stores or pharmacies, but are a little pricey. I bought a 100-count bottle from GNC for $9.99.

Chances are you probably have the other ingredients somewhere around the house, so let's get started!


First, break open 2 charcoal capsules and pour into your mixing bowl.


Add 1/2 teaspoon of water to the charcoal. Allow to bubble & sit for a couple minutes, so that the water is mostly absorbed.


Next, squeeze in about 2 teaspoons of aloe vera gel.


We'll then add about 2 teaspoons of honey.


Lastly, pour in 1 teaspoon of sugar. 


Mix all of the ingredients together until you have a smooth, even consistency.


Spoon your mixture into your container, & you're ready to try it out!


You can use your charcoal mixture as a slightly abrasive facial scrub or as a mask. 
It is IMPORTANT, that since this contains aloe vera gel, to NOT apply it or wash with it around your eyes. It can cause extreme eye irritation.
If you choose to use this cleanser as a mask, once applied, let it dry for about 20-30 minutes. 

Once you rinse your mask off, you should notice some changes to your skin. I definitely thought my pores/blackheads in my nose looked drastically reduced & cleaned out. 

Depending on your skin type, this mask could dry you out a bit. I tend to have semi-dry, sensitive skin, & I was a little dried out after rinsing off the mask, so I simply applied some of my daily facial moisturizer.

Lastly, this batch creates enough for probably about 2-3 uses, so if you'd like to make enough to fill your container or just have some on hand, I'd recommend doubling or tripling the recipe.

Voila! You've Made Your Own Charcoal Face Scrub/Mask!
Thank You & Enjoy!

Wednesday, November 19, 2014

Pop Bottle Tree Canvas

Much like this week's first post, we're going to be making a fun, colorful, and easy canvas project with acrylic paints & just a few other items that you probably already have around your house.  We'll be using the bottom of a pop (or soda) bottle to create floral-y tree leaves with our paint.  In case you couldn't tell, I have a tree theme in my living room at home.


(Image by Etsy on their website: {https://img0.etsystatic.com/007/0/7186093/il_570xN.368858828_hbhi.jpg}.)

To Complete This Project You Will Need:

  • Any Size Canvas You Like
  • An Empty, Clean Pop Bottle
  • Mod Podge Craft Glue
  • A Sponge Paint Brush
  • Colored Pencils 
  • Assorted Acrylic Paints
  • A Paper Plate


    Canvases can cost about $3 or $4, depending on where you purchase them.  Mine is from Ollie's Bargain Outlet.


    Mod Podge comes in a variety of sizes, but for a project this size, the bottle you need is only about $4 (with the majority of the bottle left over afterwards.)  You can find this at Walmart or any craft retailer.

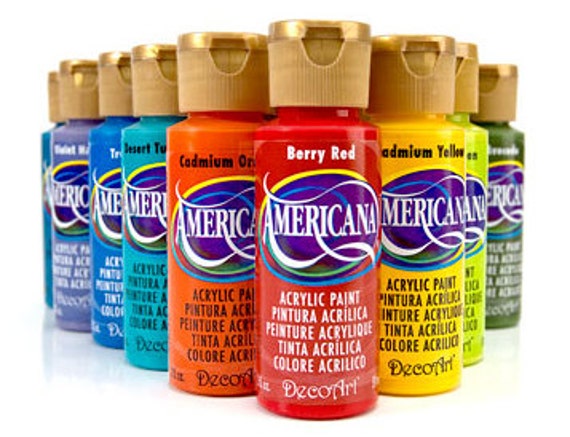
    Acrylic Paints can be purchased at many superstores, such as Walmart, Target, Kmart, etc. who have craft sections and at all craft retailers.  Depending on the type of paint (white kind of surface it's meant for), the brand, and size, the acrylic paints I've bought personally have run anywhere from 50¢
    to about $1.98.  The number and colors of acrylic paints you would like for your canvas is completely up to you.

    Sponge Brushes are easy to find at just about any retailer.  I purchased mine in a package of about 10 at Dollar Tree for $1.  


I first squirted some paint onto my paper plate, and then dipped the bottom of my pop bottle into it, making sure the paint covered the 4 sections and middle.


Next, I pressed the bottom of the pop bottle onto my canvas where I wanted my tree leaves to be.  I wanted to do this placement first so that I'd have a started point to combine with my drawn tree trunks.


I then continued with my base leaf color of green to more fully develop the shapes of the trees and leaves.  This project is a little more abstract and playful.  I kinda felt like it looked like a kid's finger painting, but I didn't really care.


As you can see in the above picture, after I added more "leaves" to my tree, I also made a rough sketch of my tree trunks.


Next, I colored in my tree trunks with colored pencil, to give them some depth & definition, while also letting my first layer of "leaf" paint dry.

I then chose 3 more colors of acrylic paint to add on top of the green (which I did not wait for each color to dry before applying the next.)  I wanted to show the changing of seasons through the leaves of the two trees, so I layered red, orange, blue, & white paint onto the leaves.

Once you've painted each of your leaf colors onto the canvas, it's a good idea to let the paint dry overnight.  Afterwards, you can paint on your Mod Podge craft glue with the sponge brush to give your canvas a seal, as well as a nice matte or glossy finish.

 Voila! You've Made Your Own Pop Bottle Tree Canvas!
Thank You & Enjoy!

Eggshell Paint Splatter Canvas

This week we're back with some fun canvas projects.  Today's will be making our own paint splatter canvas using old eggshells. This project is fun, colorful, creative, and very inexpensive.

 (Image by Graphic Leftovers Design Blog on their website: {http://graphicleftovers.com/blog/vector-rainbow-paint-splatter/}.)


Items You'll Need for this Project:
  • At Least 6 or More Emptied and Rinsed Eggshells
  • Any Size Canvas You Like
  • Mod Podge Craft Glue
  • A Variety of Acrylic Paint
  • A Sponge Craft Brush

 Canvases can cost about $3 or $4, depending on where you purchase them.  Mine is from Ollie's Bargain Outlet.


Mod Podge comes in a variety of sizes, but for a project this size, the bottle you need is only about $4 (with the majority of the bottle left over afterwards.)  You can find this at Walmart or any craft retailer.

Acrylic Paints can be purchased at many superstores, such as Walmart, Target, Kmart, etc. who have craft sections and at all craft retailers.  Depending on the type of paint (white kind of surface it's meant for), the brand, and size, the acrylic paints I've bought personally have run anywhere from 50
¢ to about $1.98.  The number and colors of acrylic paints you would like for your canvas is completely up to you.

Sponge Brushes are easy to find at just about any retailer.  I purchased mine in a package of about 10 at Dollar Tree for $1. 


In order to keep the eggs in good enough shape to use for this project, I cracked them as delicately as I could, while trying to keep the shells as intact as possible.

 Once you've rinsed your eggshells, fill them about ½ to ¾ of the way full with your desired acrylic paint colors. Until you're ready to actually use the paint-filled eggshells on your canvas, it's probably a good idea to carefully place them back into their carton.

After you've filled your eggshells, set your canvas up somewhere clean and protected, as to not get paint all over your floor or house.  I completed this project before it was cold outside, so I just leaned my canvas against a tree trunk. 

 (Image by Raspberry Rain on their website: {http://raspberryrain.co.uk/2014/06/24/fun-things-to-do-paint-filled-eggs/}.)


Now comes the fun part!  Take your paint-filled eggshells, one or two at a time, and fire them at your canvas.  Some eggshells will stick with the paint of your canvas, giving it a cool "mixed medium" effect, while others will fall off, just leaving their paint behind. 


Once you've splattered your eggshells onto the canvas, it's a good idea to let the paint dry overnight.  Afterwards, you can paint on your Mod Podge craft glue with the sponge brush to give your canvas a seal, as well as a nice matte or glossy finish.


Voila! You've Made Your Own Eggshell Paint Splatter Canvas!
Thank You & Enjoy!